How to Turn your iPhone camera into DSLR | Latest camera setting for iPhone 2023 – TechDisko
I. Introduction
Are you tired of your iPhone’s camera not capturing the perfect shot you envisioned? Don’t worry; you’re not alone. Luckily, with the latest advancements in iPhone camera technology and settings, you can turn your iPhone camera into a powerful DSLR, capturing stunning images. In this article, we’ll explore various iPhone camera settings and techniques to help you achieve professional-quality photographs. Let’s get started!
II. Importance of iPhone Camera Settings
Before we dive into the specifics, it’s crucial to understand the importance of camera settings in achieving high-quality photographs. Your iPhone’s camera settings determine how your camera interacts with light and colors, ensuring you capture the perfect shot. By tweaking these settings, you can achieve a level of control over your images similar to that of a DSLR.
III. Basics of iPhone Camera Settings
A. Exposure
Exposure determines the amount of light that enters your camera. To adjust exposure on your iPhone, tap the screen to focus and slide your finger up or down to increase or decrease the exposure. A well-exposed photo will have a balanced distribution of highlights and shadows.
B. Focus
To achieve sharp images, you need to focus on your subject correctly. Tap on the screen where you want to set the focus, and the iPhone will automatically adjust the focus for that area.
C. White Balance
White balance ensures that the colors in your photos appear accurate. While the iPhone camera does a decent job of automatically adjusting the white balance, you can use third-party apps to fine-tune the settings for even better results.
IV. Advanced iPhone Camera Settings
A. HDR
High Dynamic Range (HDR) is a setting that combines multiple exposures to create an image with a broader range of highlights and shadows. Enable HDR in the camera app’s settings for capturing detailed images in challenging lighting conditions.
B. Portrait Mode
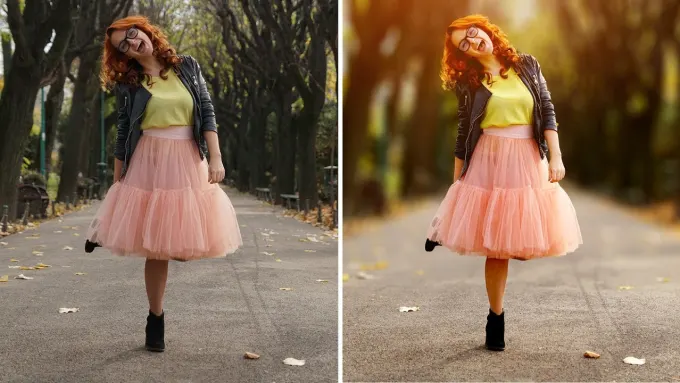
Portrait mode is a feature that creates a depth-of-field effect, blurring the background while keeping the subject in sharp focus. To use this mode, open your camera app and swipe to “Portrait,” then follow the on-screen instructions.
C. Live Photos
Live photos capture a few seconds of motion before and after the shutter button is pressed. This feature can add a touch of life to your still images. To enable live photos, tap the concentric circle icon in the camera app.
D. Night Mode
Night mode is a feature that allows you to capture stunning low-light images without using a flash. It’s automatically enabled in low-light conditions, but you can also manually control the exposure time for even better results.
V. Third-Party Apps to Enhance iPhone Photography
There are several third-party apps available that can help you unlock your iPhone’s full potential, offering advanced camera settings and features. Some popular apps include:
- Halide: A manual camera app that offers full control over exposure, focus, and white balance, as well as RAW image capture.
- ProCamera: An app that provides advanced settings such as ISO, shutter speed, and aperture control, along with features like HDR and low-light shooting.
- VSCO: A powerful photo editing app with a built-in camera, allowing you to capture and edit your images with a variety of filters and tools.
VI. Useful Tips for Better iPhone Photography
Here are some helpful tips for taking your iPhone photography to the next level:
- Keep your lens clean: A dirty lens can result in blurry or distorted images. Wipe it with a soft cloth before taking photos.
- Use the rule of thirds: Divide your frame into a 3×3 grid and place your subject along the grid lines or at the intersections to create a balanced and visually appealing composition.
- Experiment with angles: Don’t be afraid to explore different perspectives. Get down low, shoot from above, or try different angles to create unique and eye-catching images.
- Steady your shots: Keep your hands steady while taking photos or use a tripod to prevent camera shake and ensure sharp images.
- Edit your images: Post-processing can greatly enhance your photos. Use editing apps to adjust exposure, contrast, and colors, or apply filters to create a desired mood or style.
VII. Conclusion
Turning your iPhone camera into a DSLR is easier than you think. With the right camera settings, techniques, and third-party apps, you can capture stunning, professional-quality images using your iPhone. Practice and experiment with different settings to find what works best for you, and never stop learning to improve your photography skills.
VIII. FAQ
1. Can I use an external lens with my iPhone?
Yes, you can use external lenses to enhance your iPhone’s camera capabilities. There are various clip-on lenses available, such as wide-angle, macro, and telephoto lenses, that can help you achieve different photographic effects.
2. Is it possible to shoot in RAW format with an iPhone?
Yes, some third-party camera apps like Halide and ProCamera allow you to capture RAW images, offering more flexibility during post-processing.
3. How can I improve the stability of my iPhone when taking photos?
To improve stability, hold your iPhone with both hands and gently press the shutter button. Alternatively, use a tripod or a smartphone stabilizer for even better results.
4. What is the best iPhone camera setting for low-light situations?
In low-light situations, use Night mode to capture well-exposed and noise-free images. You can also manually adjust the exposure time for better results.
5. Can I use manual settings with the default iPhone camera app?
While the default iPhone camera app offers limited manual controls, third-party apps like Halide and ProCamera provide a comprehensive set of manual settings for advanced photography.

